Our team members have similar ideas, When designing our story we hope to create something entertaining that keep up children’s interest so that it would keep them participate in the entire educational video. As we all agreed to have our scene with the studio as our background environment, we had to create a narrative storyboard based in a studio. While brainstorming the narrative, we found that we had fox or dogs in some of the paintings, and we decide to create a fox as our narrative character.
Our story features a young fox discovers John Luke’s art studio and went on a fun and educational adventure by engaging with the paintings. We describe the story narrative that we create, the way the fox interact with John Luke’s paintings and scene we want to show to the audience in the storyboard. Every member responsible for each parts and combine it as a whole complete story at the end.
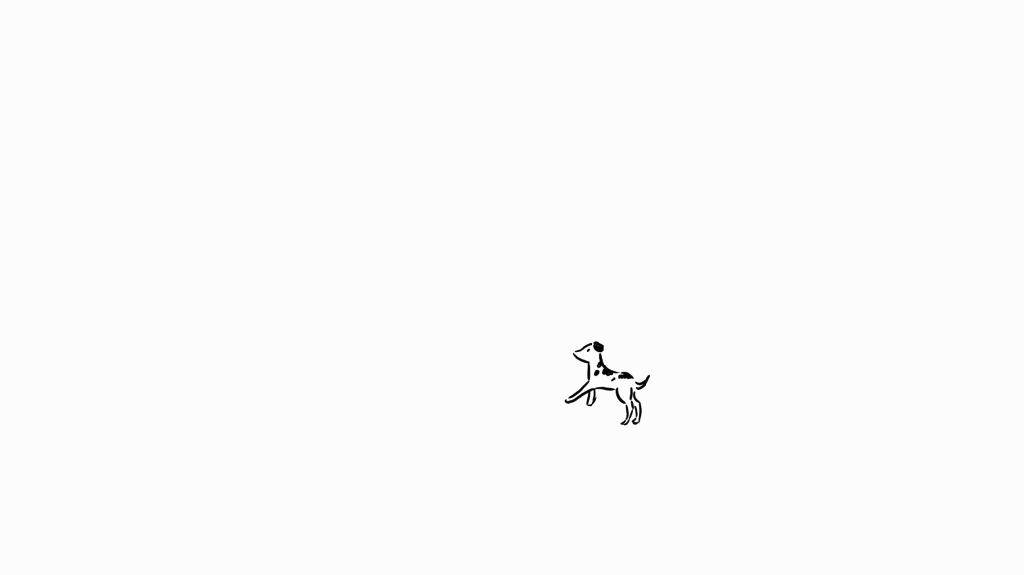
We have Darragh design our narrative character, the Fox. She is talented in designing animals, and we all love the Fox that she designed and we decide to use it as out narrative character.
Draw by Darragh.
Background Environment
And we have Andrada design our studio background environment, Andrada feel more confident in environment design and we can see she is really talented in designing environment.
Draw by Andrada.
Script
We also have the finalist script for the narrative, our member Andrada did this to helps us get on the right path, it allows us to ensure the story follow the script. (As each member is doing each part, we have to ensure that everyone follow the script to ensure the succession of the story.
Before staring to animate, I did some rough animatic sketch (walk cycle) to see whether which are more suitable for John Luke’s painting.
Animated by Aveline Yong. Character’s walk cycle. Animated by Aveline Yong.
This shows how we want the characters in the picture to move.
Animated by Aveline Yong.
This is the rough animatic shots that I am in-charge.
However, we did made some changes at the end due to limited time, and to ensure the quality of the video, we decide to change the fox just watching the third painting instead of jumping into the painting and interact with it. As for the ending, instead of the fox jump out through the window and the camera zoom out along with it, the fox will be standing on the table, and thanks the audience, then it jump out through the window and the video end.
Our team member came out with several ideas on how we want the shots be made, how we want to present John Luke’s paintings in animated shots, and we found in the Polish city of Gdańsk, there are over 50 artists producing pictures in the style of Vincent van Gogh. Their oil paintings are part of the feature film “Loving Vincent”, about the Dutch painter’s life and work. We really love how they present Van Gogh’s paintings and we think it suitable for John Luke’s painting. Some of our member’s family member work in education fields or the member itself have experiences on contact with children. We found that children are much more interesting in watching moving images (animated shots) beside than just still pictures.
This is a good starting point as we get some insight in how to animated the scene and the presentation style, it also allows us to shows more story about the paintings that we want to show. With the limited amount of time that we have for this project, we try our best to refine the project into the way that we hope to present. We also think of having a character for narrative beside it for explaining to the children about the story of the painting.
A narrative character helps to explain to children as sometimes it might be difficult for them to understand by themselves.
The 12 Principles of Animation is really a good references on animating.
Beside than a luxurious, modern, studio, I hope to design a simple, clean studio, so that the audience will not distract from the additional element and focus more on John Luke’s paintings. We brainstorm some simple design and choose the most suitable for our background environment.
Draw by Aveline Yong.Draw by Aveline Yong.Draw by Aveline Yong.Animated by Aveline Yong.
In this module, we have been assigned to work on a group project with National Museums NI. I am teamed with Adrian Mallon, Andrada Deane, Charlie Corrigan, Darragh O’Neill. Due to the pandemic that we are unable to work in personal, we will have call meeting regularly beside than meeting up and contact to National Museums NI through email.
National Museums NI care for and present inspirational collections that reflect the creativity, innovation, history, culture and the people of Northern Ireland. They look after 4 museums across the country – Ulster museum, Ulster Folk Museum, Ulster Transport Museum & Ulster American Folk Park. David Tosh is their research coordinator and will drop in at different stages during the semester to offer support and feedback toward the projects. And our team will be working with David on our group project.
We were given topics to choose to work on, we first researched on Irish artists that the museums represent as we wanted to introduce children to more local artists and our team decide to work on John Luke’s Painting. Our team also interest in doing shots for children’s education, and we hope to introduce John Luke’s painting through animation, something fun yet educational. Before starting working on project, we done some researches on John Luke’s painting. Looking at the website, they are really nice works that seems really interesting. All of our member also hope to do in 2D Animation.
We have meeting with one of the curator, Anna, we spoke our ideas on how we want to shows John Luke’s painting and make sure that we are aware of restriction/rules that we need to be aware of as we are doing project with John Luke’s Painting.
Following on from introductions to animation techniques and principles from Animation first year. This assignment is to practice and enhance our methods of biped animation. This assignment can be animated in 2D or 3D.
I had studied walk cycle before during first semester of year one. The book ‘The Animator’s Survival Kit’ by Richard Williams which is always a good start.
Richard Williams talks about movement of the character, such as human’s walking position such as, how does the weight shift when the character moves. Audiences able to understand the actions or expressions whether the character is realistic or abstract.
The Animator’s Survival Kit
I done some short practice in order to understand the timeline features, setting keyframes, layers and etc. First, start with rough sketches for each aspect of the body on separate layers. The body part were separate into 5 parts: Head, Torso (Body), shoulder and arms, the hip, and legs. So each part can be animated differently, such as the head movement able to added when the body move.
The Illusion of Life: Disney Animation
On the other hand, the keyframes and the in-betweens are also incredibly important as it shows proper contact positions to make the walk cycle go smooth rather than just hop up and down.
The Animator’s Survival Kit
While animating it, I kept in mind that the joints of the legs would be following an arc as the character moved and the shoulders are mostly opposite the hips according to the weight shift.
Draw by Aveline.
After the main body parts are done, I want to add in some secondary motion with the hair. However, the hair seem affected by the movement of air, rather than just the bobbing of the head. So I look on some tutorials to get some more insight into how it works. These small details might affect the whole picture looks dull. I am not sure will I use it in my project but it is value for study.
In order to make the whole body mechanics and movement look more realistic and reasonable, the 12 principles of animation should also be considered in it. The arms’ movement had more weight by applying follow-through and overlapping actions. It works starting from the shoulder and working down to the elbow and finish at the wrist, the motion that could showcase the overlap of motion before going into the follow-through motion.
I also try to do practice on back view, as mostly we did is view from side perspective, it was quite a different perspective while animating it. I also would like to give an event for it rather than just walking, I add on tiny rocks and the character gets trapped while walking on the street.
Adding in-betweens in is to keep them loose and go smooth rather than just the keyframes. I worked straight ahead when I was adding them in as in order to be as fluid as possible. Onion skinning helps a lot on this, the line of motion and arks were easy to plot out and work within. I think the most challenging part is to remain the same mass of the body (not to get lost from it) while animating the body’s movement.
To explain body Mechanics, I always hope to do a fight scenes and now I have a chance to do it in my assignment. An action that shows the character do a high kick. Same as the walk cycle, first layout (rough sketch) on the movement on the keyframe, then add in-betweens and clean up. Things go well when you get to know the principles and methods of it.
I really enjoy learning in this course. I get to know different parts of body and the movement of the character. I believe the more practice exercises, the more smooth the animation. The interesting part is the walking part, even though the character is just walking, but it occurs with different features according to sizes, weight, shapes, different events or even the characteristics itself.
I think I need to speed more time on setting in-betweens, it shows the animation runs too fast or lagging on the timeline if the in-betweens add-in on the wrong frame. Not only that, I need to practice more in using software Adobe Animate or Photoshop for 2D animation. I hope that my work able to look more professional in future. What I found in this assignment is that timelines (Keyframe and in-betweens) and the line art take priority in this animation.
To be honest, I was not sure what to do and how to work in Unreal Engine at the beginning. I even have to make a whole layout by my own. Even though our lecturer had teach us during in class, but I felt so overwhelmed that I had to go search tutorials on YouTube in order to help me. It is a 4 hours long tutorial but I am positive that I will learn a lot of valuable information from it.
The first problem that our group met is importing assets to individual unreal project. Some suffer technical problem, some of us suffer 3D models does not work properly in Unreal Engine (or texture does not apply with it). Most of us suffer with copying assets into own project file. However, after watching tutorial on migrating objects between projects, it was not that difficult than I expect.
Previously our member had created a landscape together, Philip was in charge of it, so all I have to do is just place the assets on to it. As we have a town, we also have a flat area for us to place our town, and the mountain will be for the castle.
To be honest, Unreal Engine was not that hard to operate, the only thing is that the perspective view was quite hard to control and I do feel dizzy during placing the assets. And you have to be really careful while arranging assets in Unreal Engine, I accidentally delete some assets or its texture while arranging the folders, which cause that I might need to redo some parts. However, if your model were well-organize, the assets should have no problem in Unreal Engine and all you have to do is just putting them in your scene.
Our lecturer also send us extra model assets that we can use in our project, I do not really use it especially the particles (such as winds, water or falling leaves). As I hope to present a frozen kingdom, no breeze or falling leaves or even fire spark. So I just place actual assets in my project.
Post Production
After I finish with the environment setup, I start to work on cinematic production. I always want to take a cinematic approach to what I was doing. I was curious about the angles and shots so I went into player mode in Unreal Engine to have look on it. I kind of already had a mind of what shot do I want to take or how it goes while I was doing the environment setup.
The most difficult part in Unreal Engine I think is setting up the camera, I do not know why my camera preview screen were so big, the big screen block my view which cause me that I cannot see where is my camera and hard to control the camera’s movement(track). I try to fix it for 3 hours and I just gave up. I continue to work with the big screen.
After watching tutorials, I decided to try on setting keyframes in the sequencer. At first, I had some problem on the angles, for example, my camera would rotate to a wrong direction. I also having problem on setting the location such as my camera does not move with the keyframe. I found that I forgot to set in the keyframe instead of just moving the camera.
After rendering the video, some floating rocks appeared in my scene. I’m not sure what the problem was. Oisin told me to turn off the ‘simulate physics’ section on the objects or it creates the problem. I did not know about that and just deleted the problem rock and replaced it with a new one. The final effect was good.
Reflective Post: Animation Strategies — 3D Environment
There are so many possibilities while working with Unreal. I am incredibly proud of my team for being able to come together in order to create such amazing assets. These days might be difficult for us to gather for discussion, or meet up for assignment, but we have gone through all the difficulties. I am also proud of myself for being able to get through the barrier such as technical problem such as laptop not working for Unreal Engine, meeting our member for group assignments (even though we meet up online), from being frustrated by now being fully able to understand Unreal Engine. Finally, I hope that I able to get used to Unreal Engine on keyboard shortcuts /menus or setting camera or getting used to it picture (does not get dizzy)
As a group, setting up a Discord server for our members to keep in touch is necessary, it is much more sufficient and much better than Facebook group chat. We also set up an asset list and shared the assets that we decided should be included in the project. Philip set up a Trello board for us to use, so that we able to keep each other updated on our progress.
After decide our concept for the environment and the castle, its time for us to work on 3D models. Each of us were assigned different parts of assets to work on to ensure that we able to finish it within the deadlines.
As for me, I mainly focus on several assets such as some of the secondary assets: Farmer Hut, Paddy Field and Crops, and some Treasure Box, Wooden box. And for the primary assets are Doors, Stone gates and stairs. First starting from modelling the most simple — Treasure box. I did some simple blocked out of the shape for the treasure box then start to add details on it. The treasure box does not take too much time to model.
Next, is the doors / gates for the castle. First I have done some simple sketches of the door design so that our members can have a variety of choices to choose. Modeling doors and gates are easy, but adding details on it takes a bit time for it to finish. For example: some of the door frame were built by bricks, it order to make it more realistic, I model every brick with some slightly different by using vector section.
Our members also hope to have some Viking design for the doors, so I design some of the doors in 3D to allow them to have a better visual concept of the look.
Farmer Hut
Paddy Field & Crops.
Stone Gates
Boxes
Stone Stairs
The important part is that to ensure our work is clean, avoiding messy grid. Being part of a pipeline, your work might be picked up by others so you need to make sure it is usable and does not hinder the workflow. This exercise reminds you to organize your file neatly, and there may be some hidden problems occur in the models and we should know how to find them and solve them out, especially the topology around of an object.
In this module, we were given opportunity to hear from people who have work experiences in animation industry. We could ask questions that we are curious about working or advice that able to assist us.
Rachel Dixon
We had a chance to meet Rachel Dixon, even though we just met on video call due to the pandemic. The talk itself was really beneficial as Rachel has a wealth of experience in this industry. Rachel Dixon were graduated in 2016 and she is currently working as an animator on a project named Paleo Pines with a game company named Italic Pig, the company was first start up with 5-6 peoples but now had expanded to 20 peoples. Rachel mentioned she did not know that she able to be an animator till one year ago.
Rachel shared her experiences from her placement year till current what she did. Her experiences was quite hard that she have to work volunteer at the first 6 to 7 months as her placement job that assigned at the start were being pulled out and she was quite rush to look for a new job for her placement year. She even worked 7 days a week for 10 months during her placement year. However, what she experienced was valuable. Rachel had experiences involved in different sections of projects such as TV advertisement, infographic, and production of Channel 4. Not only that, her skills in using software such as Autodesk Maya and Adobe After Effect had become more fluent.
The most memorable part of her talk is that Rachel shared her experience with one of her interview for a game company. Rachel was being asked what games does she play during her interview, and she answered them she does not play any games. However, she explained that she able to provide a third party’s opinion that someone who has not experienced in game but wants to try it out. She could take a step back and look at things from a wider angle (outside of the box).
Fiona McLaughlin
We also had a chance to meet Fiona McLaughlin. She graduated in 2016 and she is one of the founder of Taunt Studios. Taunt Studio is a creative studio that provide service in a variety of fields such as Advertising, Art Direction, 2D Animation, 3D Animation, CGI Production, VFX, Interactive Media, Character Design, Commercials, Creative Direction, Illustration, Motion Design, Social Media Content. They work in either 2D or 3D animation, VFX, VR or AR, or even games.
Fiona shared her experiences on her freelance job start in Berlin, German. Her experience was unique to me. As I never experience a freelance job before. Fiona mentioned that it was quite hard for her at the start, first was the language border, second is that freelancer usually has their own workplace or office (or even their own computer / laptop) for them to work. But Fiona does not have any of the machines or workplace, so whenever she ask for the job, she has to look for studio that able to provide facilities for her to work on, which is quite rare.
Even when she founded Taunt Studio with her friend Tom Getty, they start it up from her kitchen. I was quite impressed with Fiona’s talk about her career. It was amazing to hear about how she entered the industry going straight and how she started her career from a freelancer to a studio’s founder. She also talks about what she does while starting up her studio and how she maintained it. As she is a founder of a production studio, we able to hear from another side of perspective rather than just employees, such as what kind of portfolio / qualification attracted employer, or what kind of people are the company looking for.
I also look at some artist online to get more experiences from them. One of the artist that I looked on is Laura Price.
Laura Price
Laura Price is an artist at Disney on Tangled the Series. She always shares experiences for working in Disney Studio, speed painting or tips on how to get an animation job. The first time I notice her is her video on how to build a visual development portfolio, and the outcome was overwhelming it was in terms of quality. I absolutely agree with the idea of having a high-end portfolio that contains incredible artwork.
From what I have learned from 3 artists above, the first is to be well-prepared at anytime. Sometimes we might think that it not the time yet for us to get a job, but who knows? Maybe someone just came in and look at your portfolio but it wasn’t well-organized or not updated, and you might just lose your opportunity for working in a company that you hope to work with. Second, do not be discouraged when you are being rejected or receive no response from the company that you applying for, take advantage of that! You could ask help people around you to have a look at your CV, portfolio, cover letter or even have a mock interview with you in order to correct the mistake that you made, so that you able to show the best of yourself next time. Next, try to emphasize other perspective, for example: employers or company it self. From the talks and my previous experiences, think out of the box and stand on others’ perspective helps you get a bigger picture, to understand what does the company wants and why do they request for, so that you able to answer based on that question. For example, Disney’s content is less violent because their main audience is in the children age range. Therefore, if you show fighting warriors or concept of world war in your portfolio, it might not be suitable for the company’s requirement.